How to Import a PAC into CQG
The following is a list of steps to save the PAC to your desktop and to import the PAC into CQG.
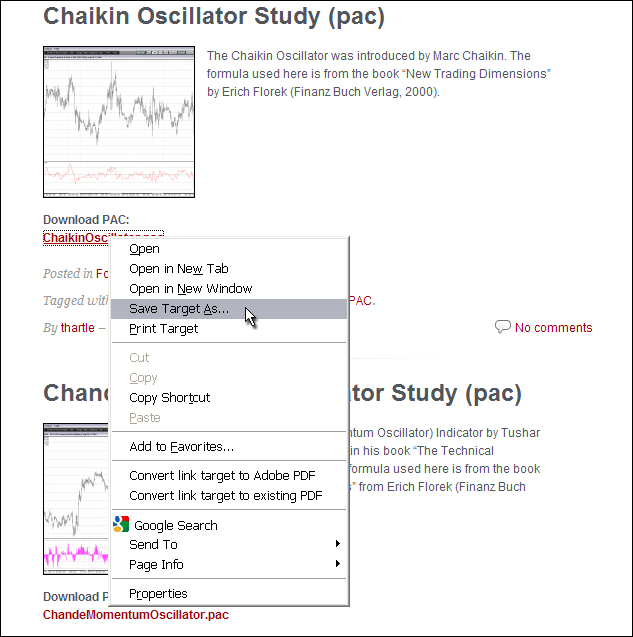
Right-click on the link to the PAC and select Save Target As…
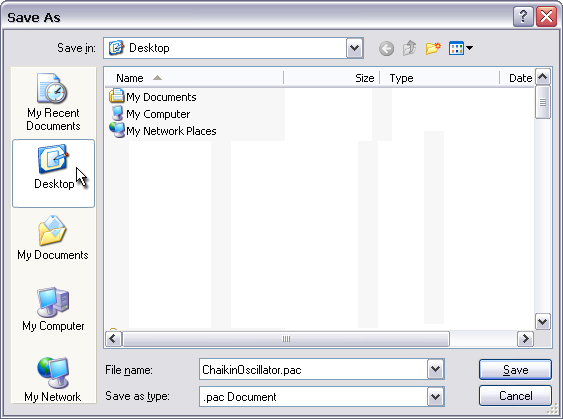
Select your Desktop
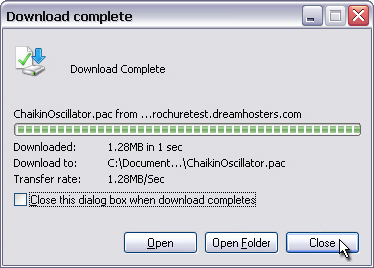
Click close once the download is complete.
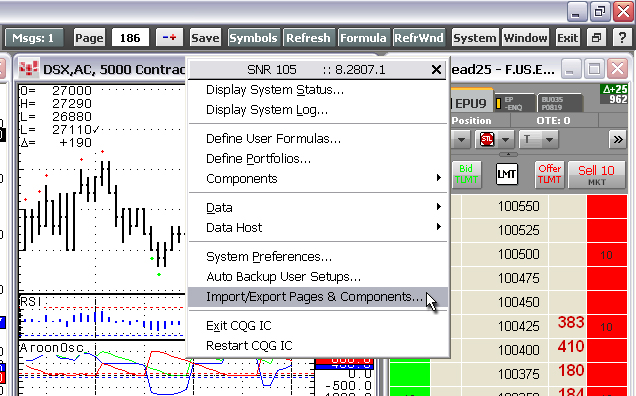
With the download complete, then left-click the System toolbar button in CQG and select Import\Export Pages and Components…
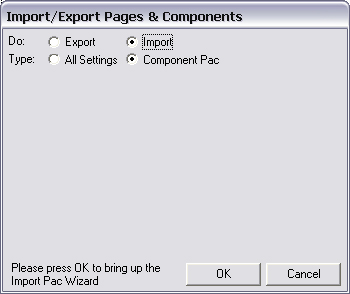
Select Import and Component Pac
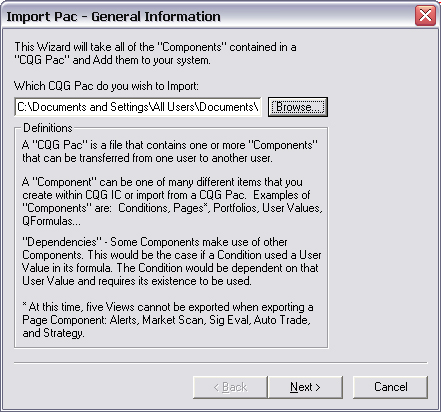
Use the Browse button to locate the PAC on your desktop.
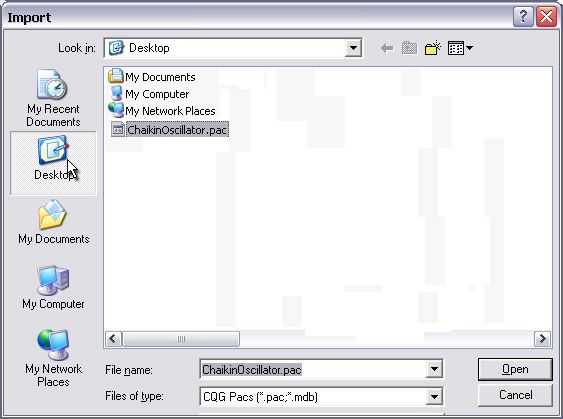
Click on the Desktop icon, then select the PAC and click Open.
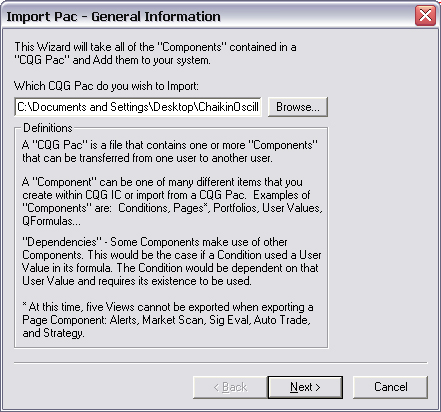
Once the PAC is chosen then click Next.
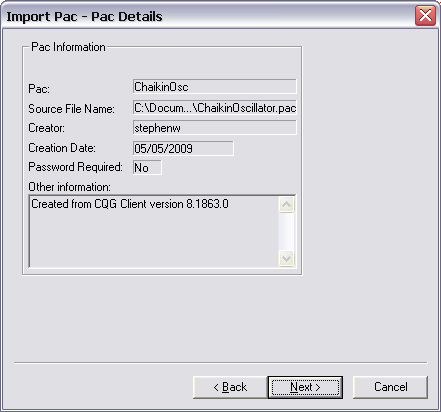
Details about the PAC are presented. Click Next.
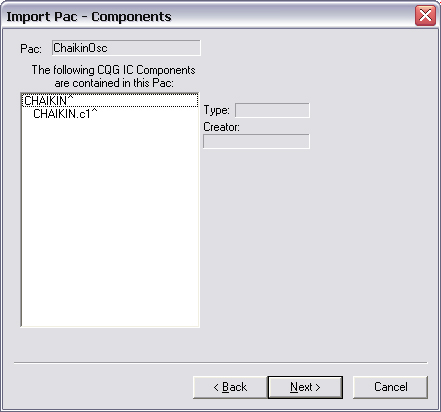
Component details are presented. Click Next.
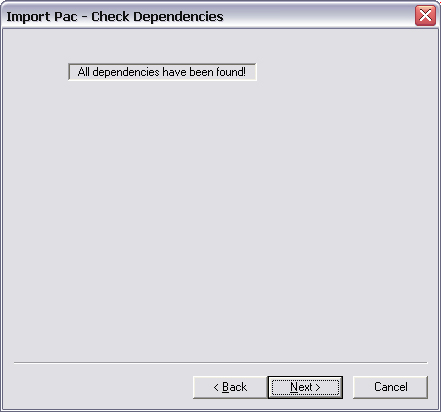
Dependencies check is performed. Click Next.
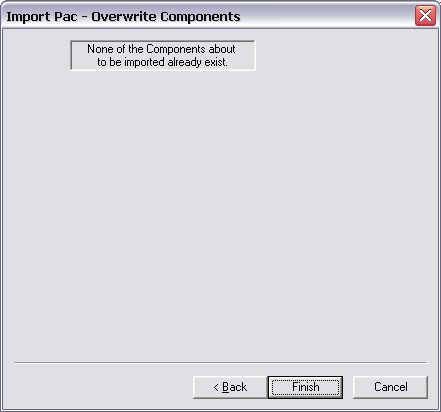
Verification of existing component that might be overwritten. Click Next.
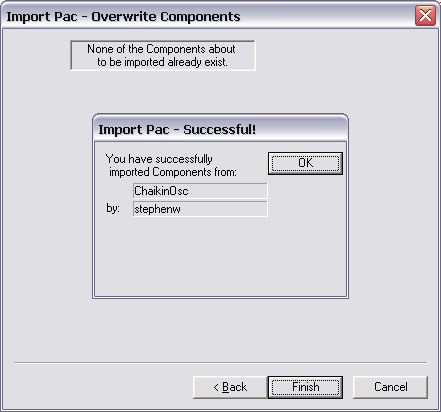
Verifying successfull installation. Click OK.
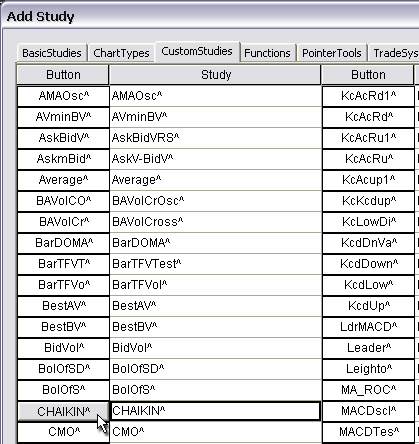
The custom study will now appear in the Custom Study menu.
By admin
3:28 pm
0 Responses
Stay in touch with the conversation, subscribe to the RSS feed for comments on this post.
You must be logged in to post a comment.